Industry insights
Injection moulding process
The injection moulding process from the concept phase to the final product can take anywhere from 3 to 12 months. This is dependent on the type of product, the design, its complexity, the materials used and the volumes required (including machinery that may need to be purchased) to complete the process.
There are numerous steps to follow in plastic injection moulding, some of which is critical and some not so. The process can vary depending on the client requirements and final product use. Whilst some projects may be completed within a very short timeframe, larger more complex projects require more time and effort to be completed.
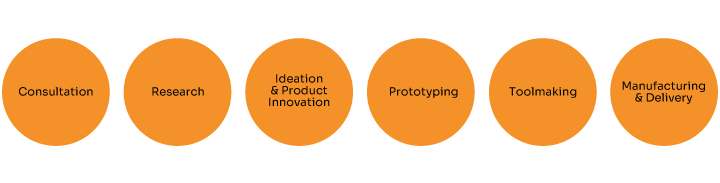
Outlined below is a simple flow chart, which explains all the required steps to follow during the injection moulding process:
The injection moulding process starts when a customer has an idea or a process of a product to be made. Once they complete their brief sketches and designs and after some consultation, the project consultation and planning can commence.
A specialist product designer is always included in the initial consultations and planning with the customer, this is to help fully identify their requirements and to ensure all appropriate specifications are captured during the critical design stage.
There are instances where a final product may be slightly different to the customer’s initial ideas. This is because a customer might know the final product that they are after, however they may not have considered the forward planning for their product in terms of output and volume. Hence why we include the designer initially as the product designer draws upon prior experience to run through the product volume that the customer would anticipate, helping to establish their requirements to integrate them into the product design.
A little known fact is that there are over 10,000 different grades of plastic that are used to build parts, so it is essential to understand the customers’ exact requirements to ensure the most suitable and cost-effective product is created. The tool is always designed to best suit the customer’s economic and production requirements using the most suitable plastic that is fit for purpose.
At SDI Plastics, we always strive to achieve the best economy for scale of production for our customers.
What happens after the project is given the green light?
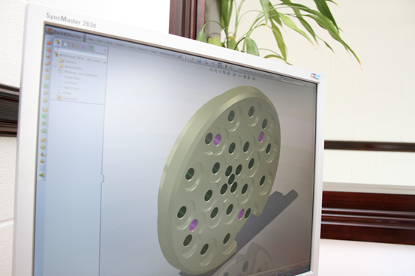
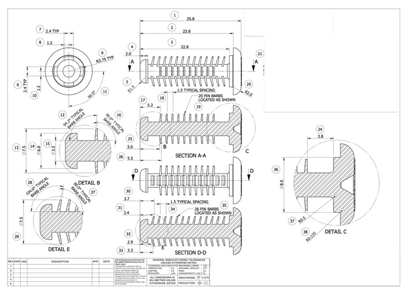
After a project is given the green light the product designer then creates a model for the part using a CAD software known as SolidWorks. After this model is created, the designer presents the 2D model to the customer as a basic PDF drawing with the dimensions of the product on the image. This initial PDF is for the customer to check and understand the initial concept of what they want built.
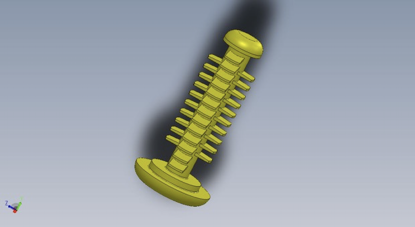
Once the customer checks and approves the initial design, the product designer then starts to design and model the parts for injection moulding. Once this is complete, the customer can virtually check the model. It’s even possible to twist and turn the part to see how the model will work.
At this stage, it is also optional to make a 3D prototype of the product. In the majority of cases the 3D prototype is not a fully functional version of the part, however it does provide the customer with an opportunity to physically see the part and get a better grasp of the final product.
Once the customer confirms the injection moulding tool design, the designer can build and continue his work to have the tool model and designs ready for production.
Once the designer has completed all his work and the customer has approved the tool designs, the designer then passes the project to our in-house toolmaker.
At this stage, the toolmaker will study the design and ask any questions if required. Once the toolmaker is satisfied with the design and any questions answered he will then start the injection moulding tool making.
This part of the injection moulding process is incredibly important. If the toolmaker makes an error then this will have consequences once production has begun. It is also important to consider the right types of metal for making the tool.
At SDI Plastics our standard toolmaking material is what is known in the industry as “tool quality” steel. This is steel of the highest grade, which will withstand intense pressure over long periods. If made correctly, a tool made from “tool quality” steel can be expected to last for decades, which is the result we aim for.
At SDI Plastics we make our tools from high-grade “tool quality” steel. High-grade steel is required as in most cases, the injection and clamping occurs under high pressure. Aluminum tools can be used for creating the prototypes or very low volume products; however, extreme caution must be used when using this process.
We design and build tools to stand the test of time. Our high quality tools will help you succeed with your product and will last for decades.
– Kulbir Dhanda, Director, SDI Plastics
If a metal prototype is required, or the final product will be very low volume, we may consider using aluminium. However it should be noted that an aluminium tool would not last nearly as long as a steel tool so is only suggested in exceptional circumstances.
What does the process typically look like?
The start to finish process depends entirely on the complexity of the product however a standard injection moulding process including a 3D prototype typically looks something like the below.
Consultation & Research
WEEKS 1 TO 2
- Initial discussions
- Initial product design created
- Send to customer for approval
- Revise and design (if required)
- Initial product design approved by customer
Ideation & Product Innovation
WEEKS 2 TO 3
- Designer and Product Designer creates injection moulding tool design
- Send to customer for approval
- Revise and update design (if required)
- Injection moulding tool design approved by customer
Prototyping
WEEKS 4 TO 5
- Building of prototype
- Send to customer for approval
- Revise and update design (if required)
- Prototype approved by customer
Toolmaking
WEEKS 6 TO 12
- Product designer builds the tool to create the product
- Send to customer for approval
- Revise and update design (if required)
- Tool design to create product approved by customer
Manufacturing & Delivery
WEEKS 13 TO 14
- Make a trial product for the customer
- Testing of the trial product
- Send to customer for approval
- Revise and update design (if required)
- Trial product approved by customer
A relatively simple mould that doesn’t include the 3D prototyping typically takes 8-12 weeks. More complicated moulds that also include the 3D prototype can take up to 16-20+ weeks to get to the product stage.
In any case, we create a project timeline and stages for each individual project and communicate openly with the customer to manage their expectations of cost and timeframes.
At SDI Plastics, we always meet our deadlines and take accountability for our projects.
What products can you make?
Budget constraints pending, we can make pretty much anything. Over the years we have built parts ranging from camera lens’, golf tees, food containers, electrical components, fence caps through to bigger items like a go kart and other sundries.
How much does it cost?
The cost of the injection moulding process varies for each project, depending on the product requirements and specifications. We will always run you through the costs and we also offer payment terms if they are required. In most cases, because of the sensitivity around the product, we sign a non-disclosure agreement with our clients at this stage.
We pride ourselves on the fact that everything we do is 100% confidential.
If you have any questions about the injection moulding process or would like to get a competitive quote for your project, please feel free to contact us or one of our representatives for a 100% confidential discussion about your product.
Let’s work together
Give us a call to book your free consultation and learn how much value can be added to your business with SDI Plastics by your side.